Adapting This Book for Another Course
Note: This book was originally published with and hosted on GitBook, so it used to contain different steps for adapting. For steps to publish with GitBook, see the old Adapting this Book lesson. The older lesson might be easier for people with less technical experience with Ruby, command line, Markdown, etc. And a final caveat - the screenshots below are partially taken from the old tutorial, so they may be out of date. You’ll be looking for things that look similar but not identical. Eventually I’ll update these for the new Jekyll narrative.
We encourage others to use this book for their own courses and to change it to meet the needs of their own contexts. The publishing platform here helps to facilitate this process. We especially imagine people reworking the exercises in each chapter to reflect their own disciplinary content. With a little effort you can rework the book for your own purposes and publish it for your students to use.
Note:
- Copying the book will only get you a particular version of the book at a particular point in time. By default, any changes we make to the book after you copy it will not be reflected in your version of the book. Syncing your version of the book with ours will likely conflict with any changes you have made, so we would only try that with great care.
Getting Your Own Copy
The contents of this book are hosted as a Jekyll site in a repository on GitHub and rendered to the internet via GitHub Pages. In addition, we use the Ed theme for Jekyll to get some pre-baked styling and functionality. When we make changes to the file structure hosted on GitHub, the changes populate out to the site itself, which renders the various files into the web version of the book. To make your own remixable copy of the book, you will need to make a copy of our GitHub repository and host your own Jekyll project through this setup. Things you’ll need to begin:
To install Jekyll and the Ed theme on your computer, I recommend following the steps that Alex Gil lays out in the documentation for Ed. He has more robust steps for doing so, though I give my own spin below. Also note that Jekyll does not play nicely with PC’s - it is possible to get it running, but it is far easier to do so on a Mac. For that reason, the steps below are for Mac.
Once you’re all set up with those installations, you will need to make a copy of our GitHub repository for your own account. When logged in and looking at our repository page, you should see something looking like these three buttons in the top-left corner of the window:

Forking is Github’s term for creating a copy of a repository for yourself - imagine a road forking and diverging into two paths. If you click fork, GitHub should start the copying process. When finished, you will be redirected to your fresh copy of the repository, which should look similar to this.
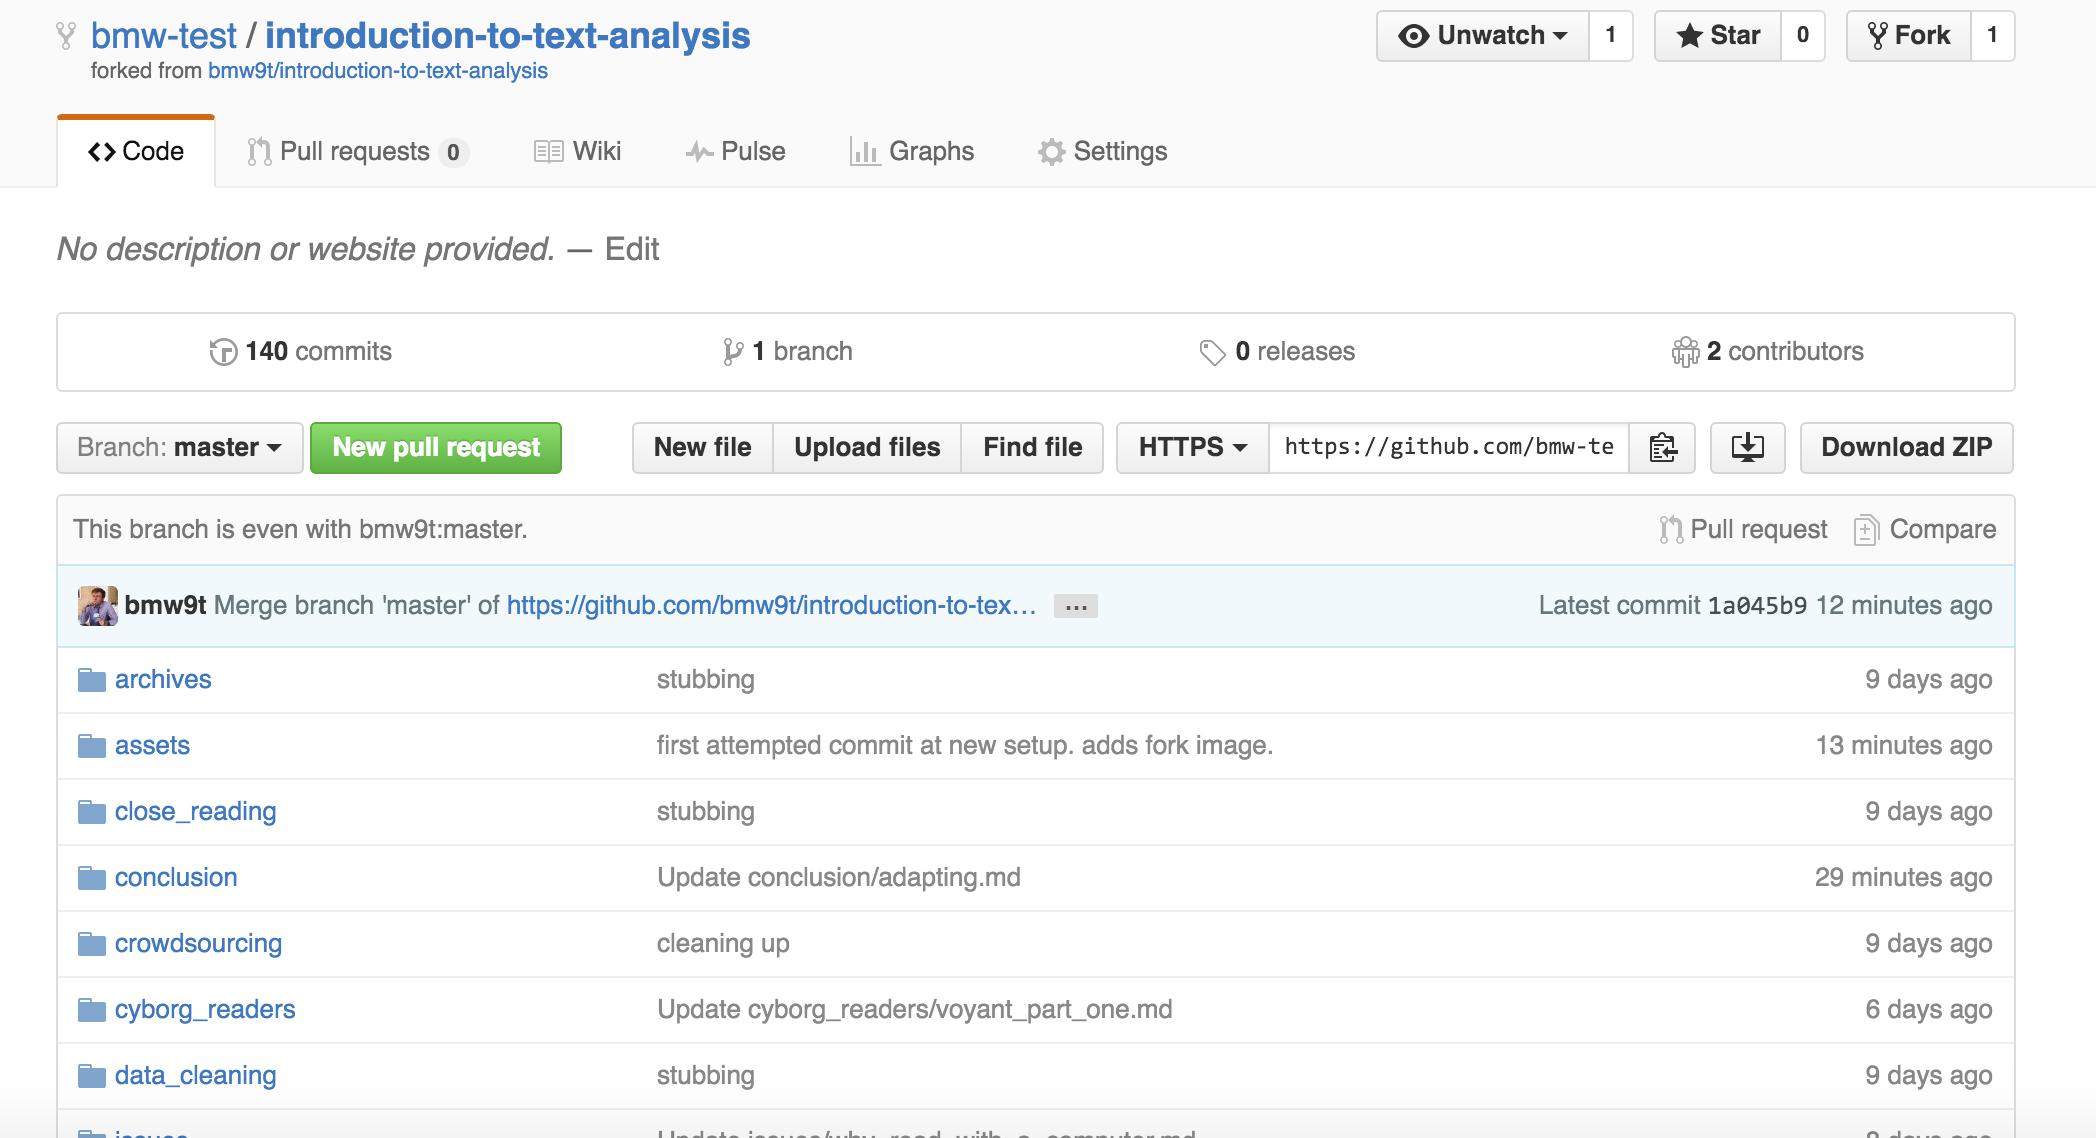
Note the “forked from bmw9t/introduction-to-text-analysis” statement at the top of the window, which lets you know where the book originated from. Above that you will see your own book’s location. You now have your own version of the book’s various files, and any changes you make to your own version will not affect our original book. GitHub will also keep track of your book’s history for you.
Once you have forked and have your own copy of the book on GitHub, you will just clone it to your computer using the clone url found at the top of your repository’s page on GitHub. Here is the one for the original book. Yours will be different:

Find your own clone url that looks like this, copy it to your clipboard, and use it like so from the command line (without curly braces):
$ git clone {your_clone_url}
This will copy the repository to your machine. From there, you can edit using a plain text editor as normal and make changes to the repository using git. You now have a working copy of the book hosted on GitHub and rendered in GitBooks (GitBooks should automatically redirect you to your copy). You can do anything you want with these files, and they won’t affect our own base copy of the resources.
From there, you have a short series of steps to set things up:
$ cd textanalysiscoursebook
$ rvm install 2.3.0
$ rvm use 2.3.0
$ gem install bundler
$ bundle install
That will change into the project folder, install Ruby, install the dependencies for the project. Then, to preview your site locally, you would run:
$ jekyll serve
To build the site from Jekyll:
$ jekyll build
And the normal Git workflow applies for sending changes up to your server:
$ git add .
$ git commit -m "a message here"
$ git push
From here you just need to know a few more things to edit your new and ready-to-remix textbook. The book is written as a series of files in Markdown, a form of markup that can easily be converted into HTML. GitBooks provides a great tutorial on Markdown to help get you started.
To publish your materials, I reccomend following GitHub’s instructions for deploying a project using GitHub pages. You can either have this project deployed as a github.io domain all its own by following the instructions for a “user or organization site”, or you can deploy the project to a subdomain as we do here by selecting the instructions for “project site”. Note: in either case, you will need to adjust the url, baseurl, and general config information in _config.yml
At this point you should have everything you need to edit your copy of the book as you see fit for your own needs. If we haven’t covered something here or you run into problems, drop us a line on our issues page.